2023-08-30-【记录】在-GitHub-上-搭建-Hexo.md 5.1 KB
title: 【记录】在 GitHub 上 搭建 Hexo urlname: -ji-lu--zai-GitHub-shang-da-jian-Hexo date: 2023-08-30 21:07:42 tags: ['Github', 'hexo', 'butterfly']
excerpt: 这段文本是关于在安装Hexo博客框架的过程中所需的一些配置和操作。首先需要安装Node环境,然后使用conda命令激活Node环境。接下来使用npm命令安装全局的Hexo命令行工具,并进行版本检查和初始化操作。然后安装hexo-deployer-git插件,并配置相关信息。建立仓库并创建gh-pages分支,修改设置文件,配置GitHub文件加速和获取token。编辑_config.yml文件,配置部署信息和主题。搭建jsDelivr反代服务器并编辑CDN.js文件。最后生成网页并推送到GitHub仓库,进行国内反代加速和备份博客。
安装 Hexo
-
conda activate node
npm i hexo-cli -g
hexo -v
hexo init
npm install
配置 hexo-deployer-git
npm install hexo-deployer-git --saveecho hexo.limour.top > source/CNAME建立
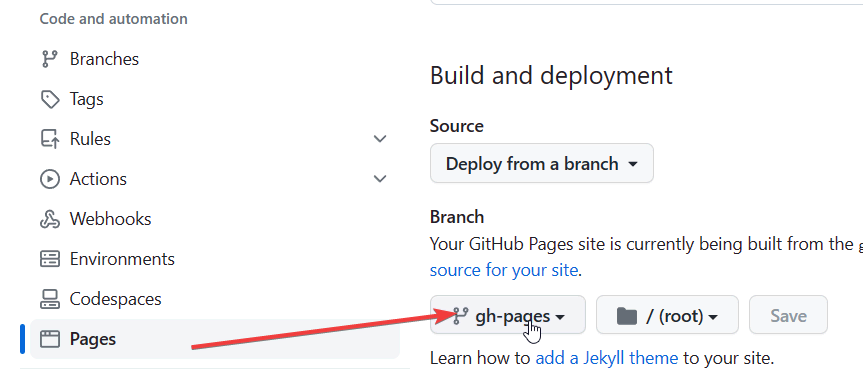
<github usrname>.github.io的仓库仓库新建
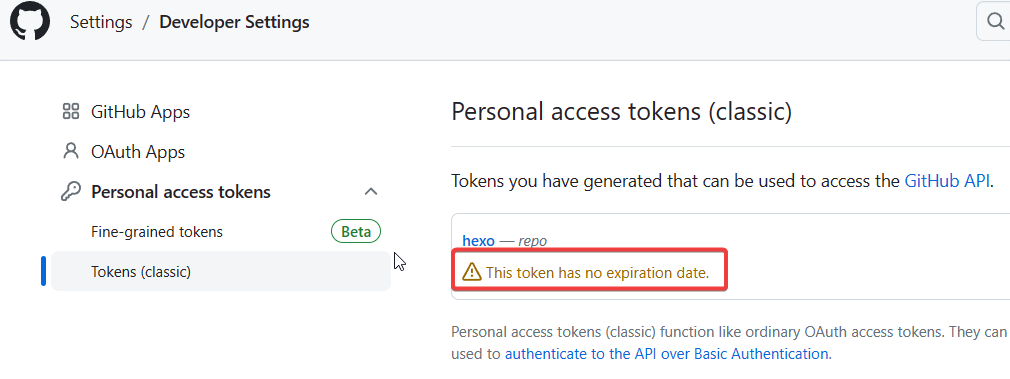
gh-pages分支按 hexo-deployer-git 的指引获取 token

编辑
_config.yml,添加内容如下deploy: type: git repo: https://oauth2:ghp_xxxxx@xxx.limour.top/xxx/https://github.com/limour-blog/limour-blog.github.io.git branch: gh-pages token: ghp_xxxxx name: xxx@limour.top # 注册 Github 的邮箱 email: xxx@limour.top # 注册 Github 的邮箱配置 butterfly 主题
npm install hexo-theme-butterfly --save
npm install hexo-renderer-pug hexo-renderer-stylus --save
mkdir scripts && touch scripts/CDN.js
编辑
_config.yml,修改内容如下theme: butterfly编辑
scripts/CDN.js,内容如下'use strict'; const { filter } = hexo.extend; // 替换 CDN filter.register('before_generate', () => { const { asset } = hexo.theme.config; for (const name in asset) { asset[name] = asset[name] .replace('//cdn.jsdelivr.net/', '//你自己的反代/'); } }, 99);-
生成网页并推送
rm -rf .deploy_git && hexo c && hexo g && hexo d国内反代加速
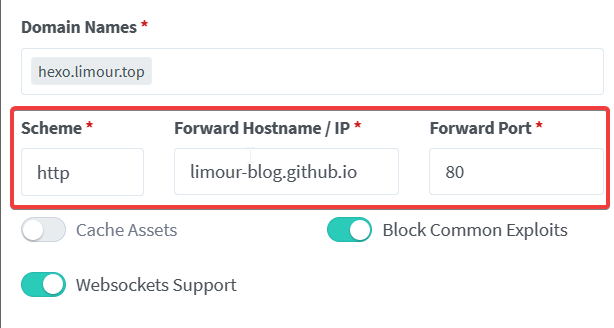
-
备份博客
编辑
.gitignore,添加_config.ymlgit init && git branch -m main git remote add origin https://oauth2:ghp_xxxxx@xxx.limour.top/xxx/https://github.com/limour-blog/limour-blog.github.io.git git add . && git commit -m 'backup' && git push -u origin +main
演示地址
附加 Waline 换 MongoDB
- MongoDB 官网 新建免费的 M0 数据库,地区选新加坡,放行
0.0.0.0/0 - Vercel 上的 Waline 项目,Settings/Functions 里更改 Region 到新加坡
- MongoDB 连接里记录下连接信息,选项如下
- 选择 Drivers 作为连接方式,Driver 为 Node.js,Version为
2.2.12 or later - 进入 Waline 管理后台,导出数据
- Vercel 里删除 LEAN 相关的环境变量,按 说明 添加 MongoDB 的连接信息
- Vercel/Deployments 里选择合适的分支,点旁边的三个点,选择 Redeploy
- 进入 Waline 管理后台,重新注册后,导入数据
附加 外链转内链
-
npm i hexo-filter-links --save 去
_config.yml添加配置links: enable: true field: "post" exclude: - "limour.top" - "*.limour.top" #1.0.4及以上版本支持
附加 部署到本地服务器
cd ~/base/NGPM/data
git clone --depth=1 -b gh-pages --single-branch https://github.com/limour-blog/limour-blog.github.io.git
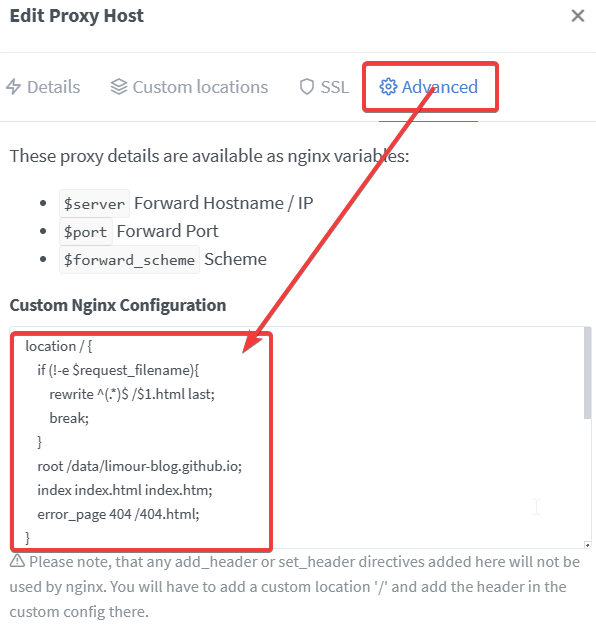
location / {
    gzip on;
    gzip_min_length 256;
    gzip_comp_level 2;
    gzip_types text/plain application/javascript application/x-javascript text/css application/xml text/javascript application/x-httpd-php image/jpeg image/gif image/png application/vnd.ms-fontobject font/ttf font/opentype font/x-woff image/svg+xml;
    gzip_vary on;
    gzip_buffers 32 4k;
    if (!-e $request_filename){
        rewrite ^(.*)$ /$1.html last;
        break;
    }
    root /data/limour-blog.github.io;
    index index.html index.htm;
    error_page 404 /404.html;
}
后续更新
cd ~/base/NGPM/data/limour-blog.github.io
git fetch --depth=1 -f && git reset --hard origin/gh-pages


